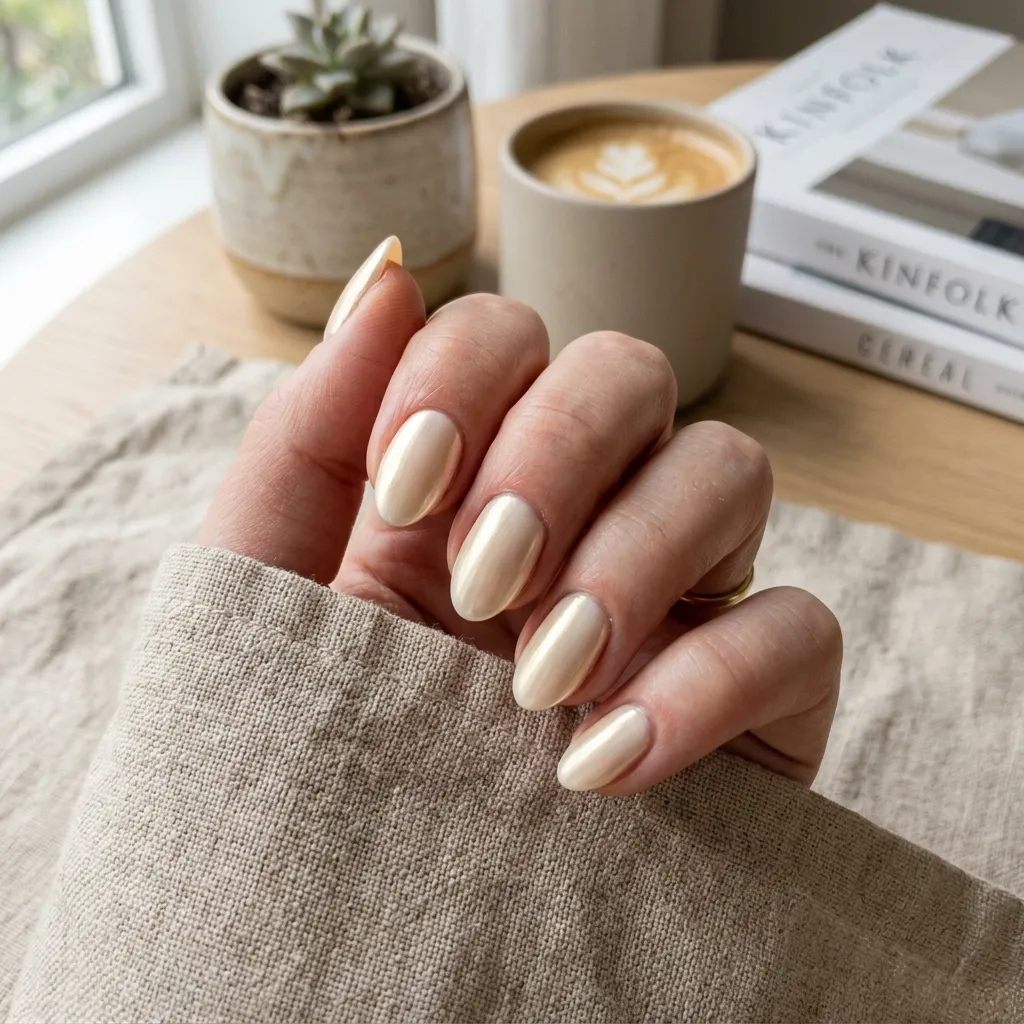
1. The Glazed Lemon Sorbet
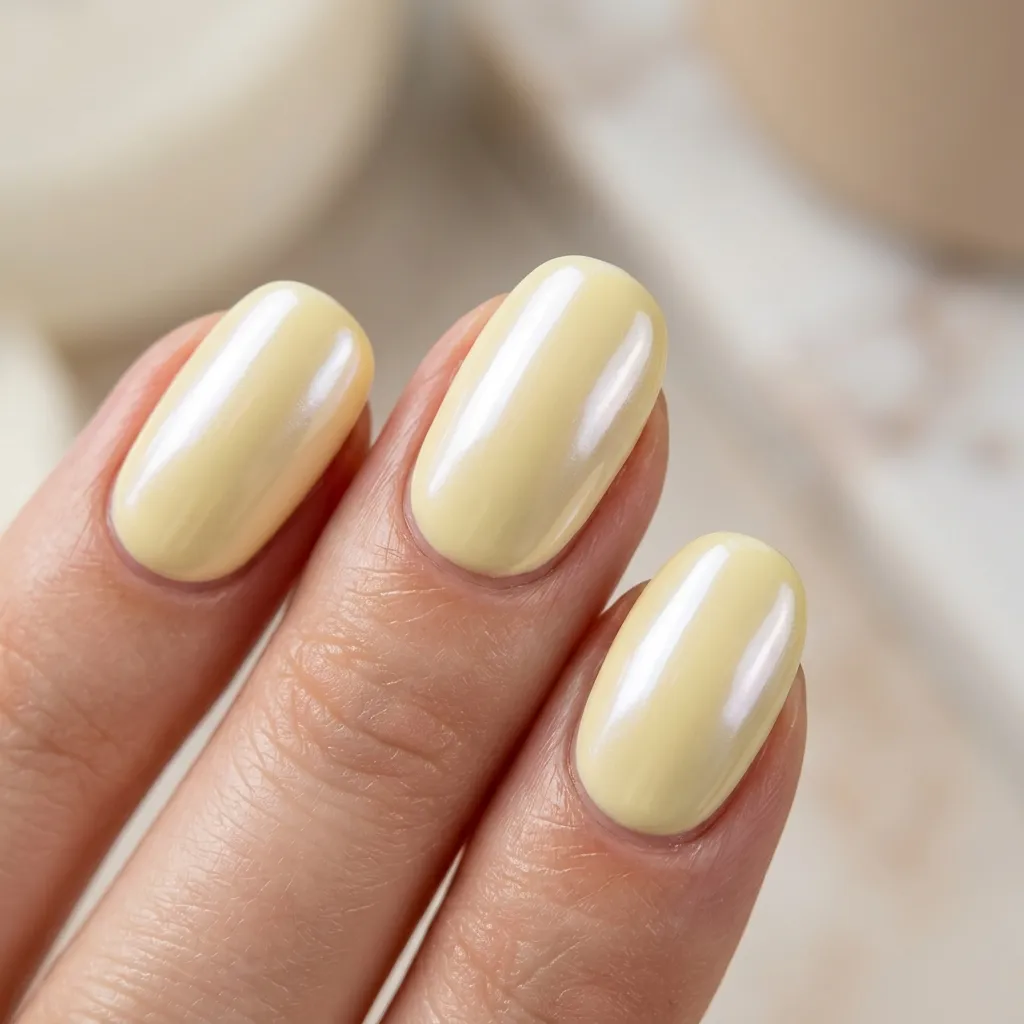
Forget the heavy yellows of summer. This is all about a pale, buttery tint that looks like it was plucked from a high-end bakery.
Adding a chrome powder finish over a soft pastel yellow gives it that “clean girl” aesthetic while still feeling bright and celebratory for the warmer weather. It’s basically sunshine in a bottle, but chicer.
- Step 1: Apply two thin coats of a pale primrose yellow.
- Step 2: Dust a white pearl chrome powder over the cured polish.
- Step 3: Seal with a high-gloss top coat to get that “wet” look.
Pro Tip: Use a sponge eyeshadow applicator to rub the chrome powder in—it gets a way smoother finish than a brush ever could.
2. Lavender Haze Negative Space
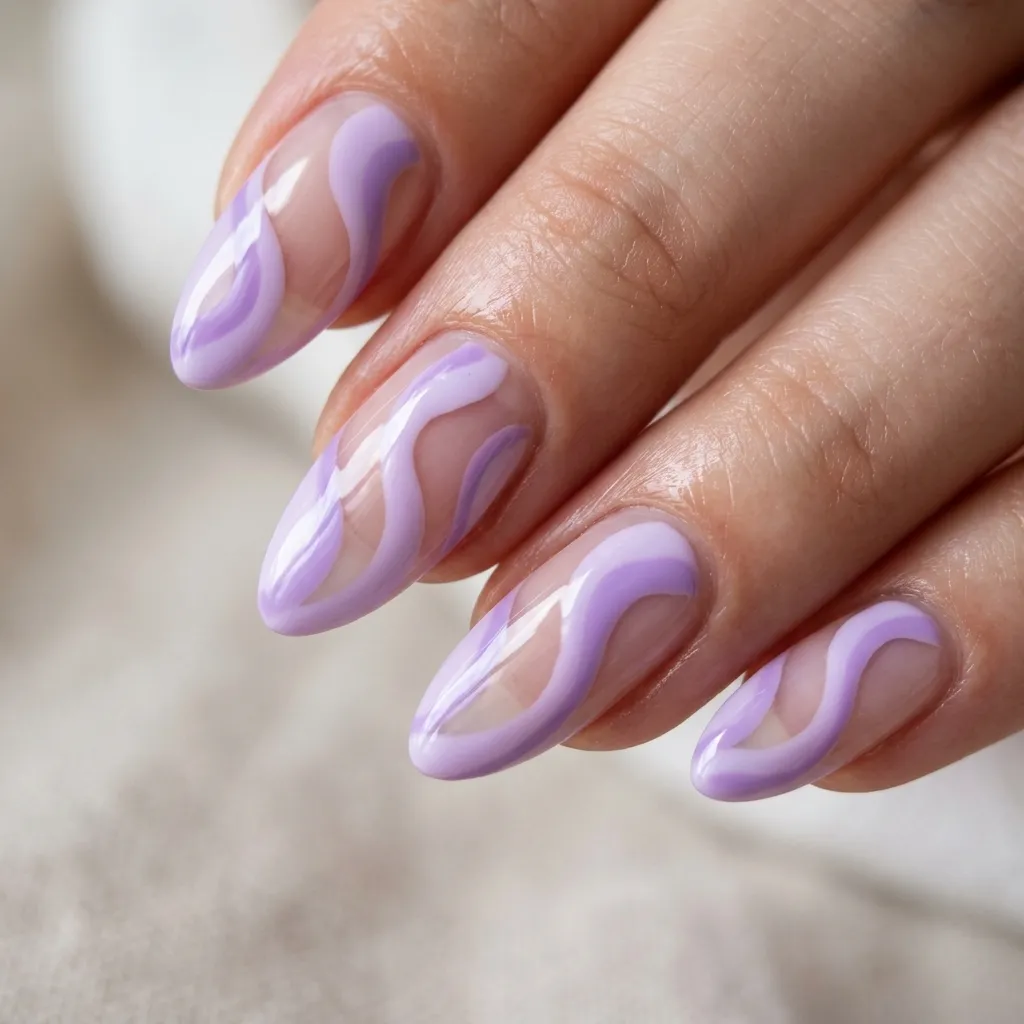
Purple can sometimes feel a bit heavy, but keeping it “airy” is the trick for spring.
By leaving the base of the nail bare (or just a sheer nude) and adding wavy lavender swirls, you create a look that grows out beautifully without that awkward gap. It’s effortless, artistic, and very Pinterest-coded.
- Step 1: Start with a clear or sheer pink base.
- Step 2: Use a long, thin detail brush to paint organic “S” shapes in lilac.
- Step 3: Overlap a second swirl in a slightly darker purple for depth.
Pro Tip: If your lines look shaky, dip a clean brush in acetone to “erase” and sharpen the edges while the polish is still wet.
3. Matcha Green Micro-French
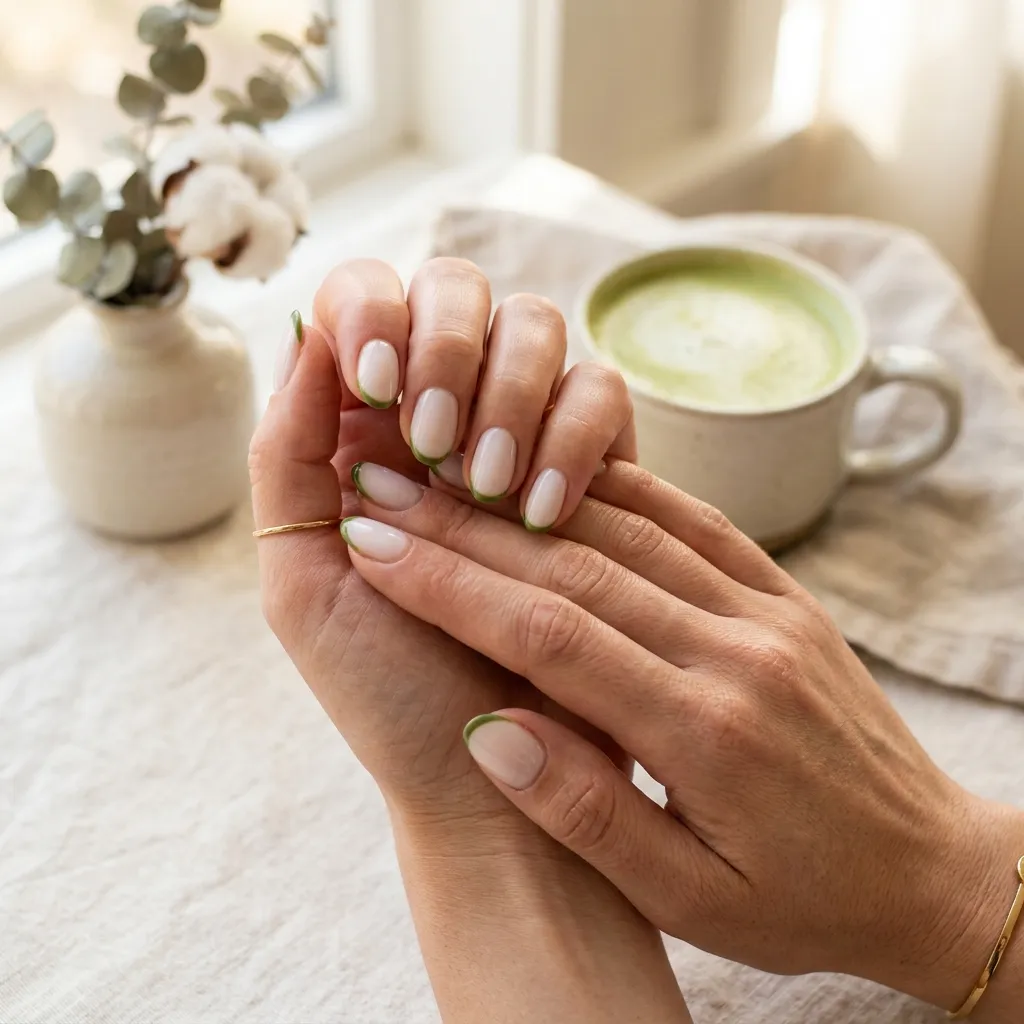
Green is having a massive moment, but we’re leaning into the milky matcha latte side of things. Instead of a thick traditional French tip, go for a “micro” line—a super thin sliver of color at the very edge.
It’s subtle enough for the office but trendy enough for your Sunday brunch photos.
- Step 1: Prep with a milky-white or “strawberry milk” base color.
- Step 2: Trace an ultra-thin line of matcha green along the very tip of the nail.
- Step 3: Ensure the curve follows your natural nail shape (oval or almond works best!).
Pro Tip: Turn your hand toward you and look at the nail upside down to make sure your French tips are symmetrical on both sides.
4. Peachy Keen Ombré
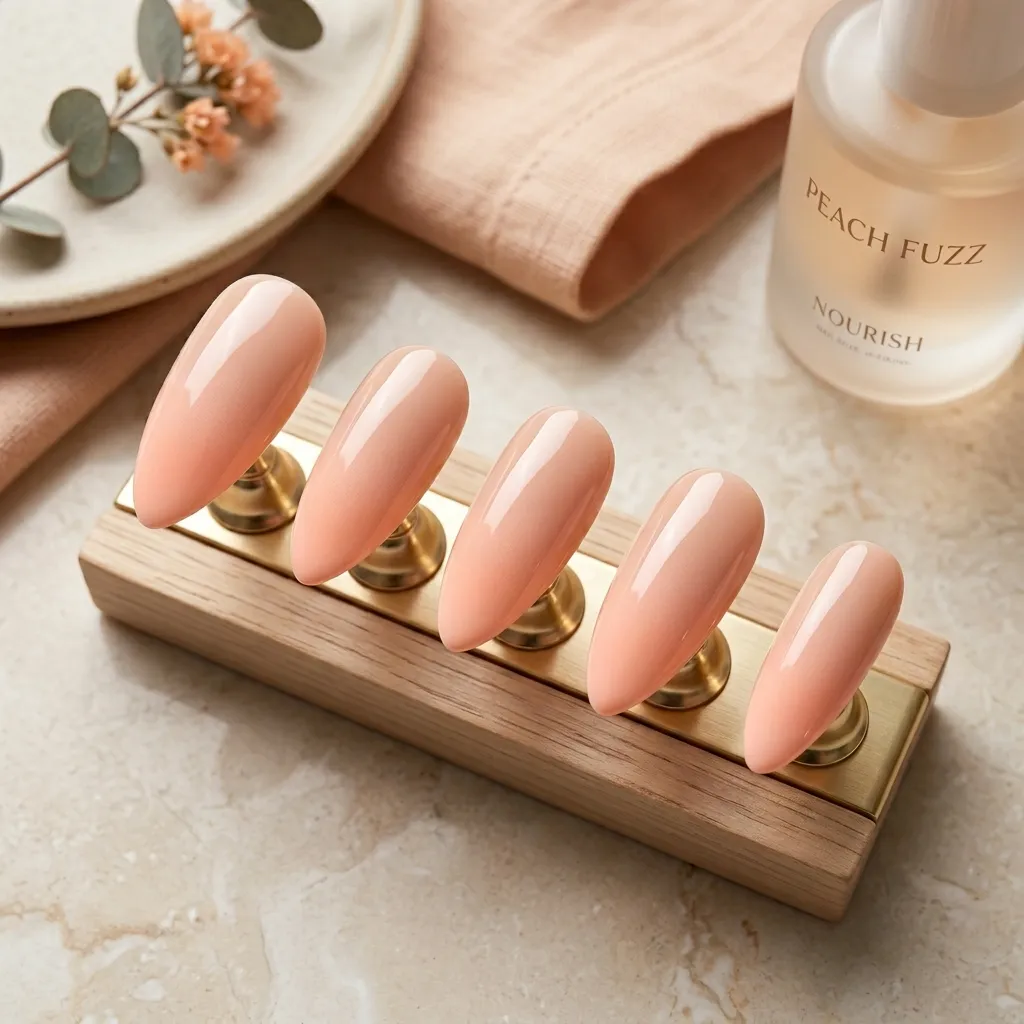
Peach Fuzz was a color of the year for a reason—it’s universally flattering. A soft gradient from a nude base to a peachy tip looks incredibly sophisticated.
It mimics the look of a natural glow and makes your fingers look about two inches longer. Who doesn’t want that?
- Step 1: Apply a nude base color.
- Step 2: Dab a small amount of pastel peach polish onto a makeup sponge.
- Step 3: Lightly bounce the sponge onto the top half of the nail, building intensity at the tip.
Pro Tip: Apply liquid latex (or just some scotch tape) around your cuticles before sponging to make the cleanup 10x faster.
5. The “Mismatched” Pastel Palette
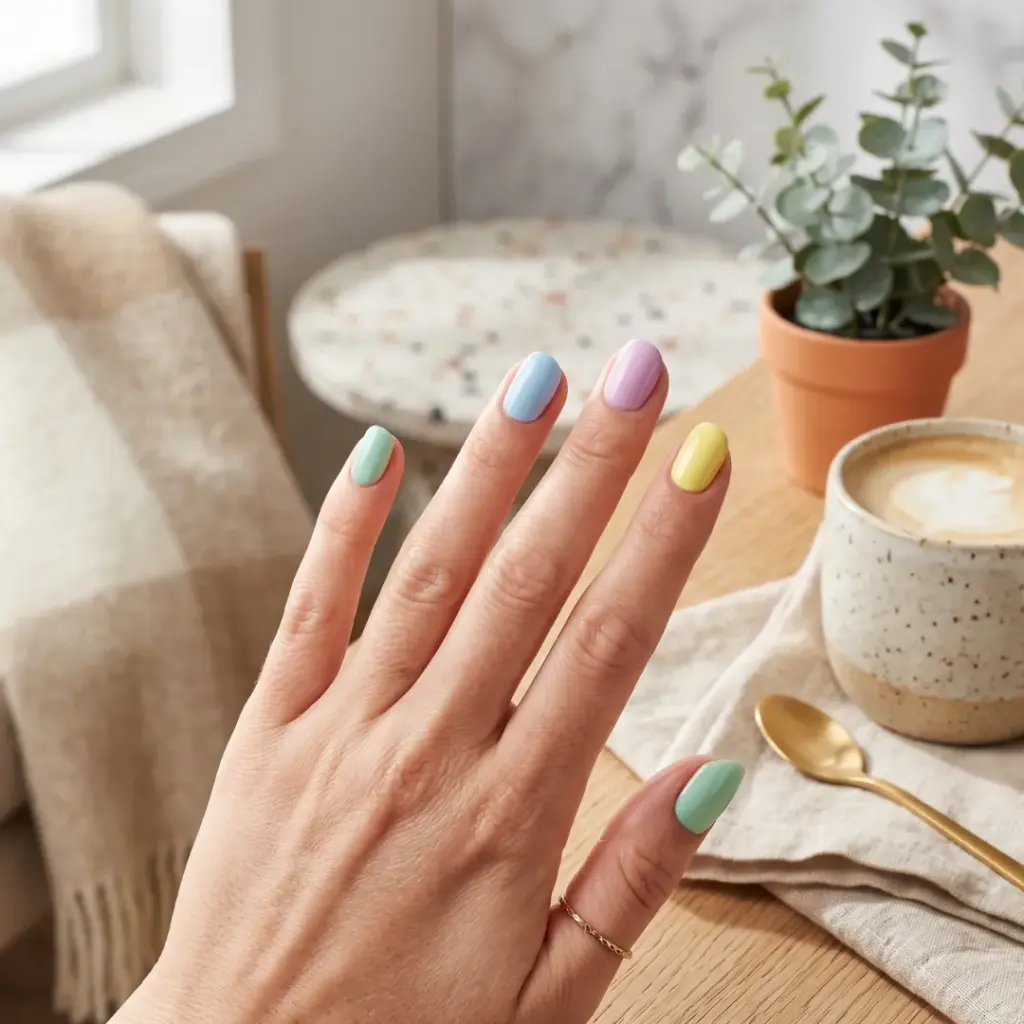
Can’t choose a color? Don’t. The “Skittles” nail trend is still going strong, but the key for spring is keeping the saturation levels identical.
Pick five different pastel shades—mint, baby blue, lilac, pale pink, and lemon—and give each finger its own personality. It’s playful, chaotic-good, and goes with every outfit.
- Step 1: Pick 5 harmonious pastel shades.
- Step 2: Paint each nail a different color.
- Step 3: Keep the finish consistent (all matte or all glossy) to tie the look together.
Pro Tip: To keep it from looking messy, try to choose colors with the same “undertone”—either all cool-toned pastels or all warm-toned.
6. Delicate Pressed Flower Accents
There is nothing more “spring” than actual florals. You don’t need to be a master painter for this one; tiny dried flowers or high-quality stickers do all the heavy lifting.
Against a sheer, milky-blue background, these look like something out of a Victorian garden. It’s incredibly romantic and feminine.
- Step 1: Paint a base of sheer, watery blue.
- Step 2: Use tweezers to place a tiny dried flower or floral decal on the ring finger.
- Step 3: Apply a thick layer of top coat to encapsulate the flower so it stays flat.
Pro Tip: If using real dried flowers, flatten them between the pages of a heavy book for a few hours before applying them to your nail.
7. Robin’s Egg Speckle
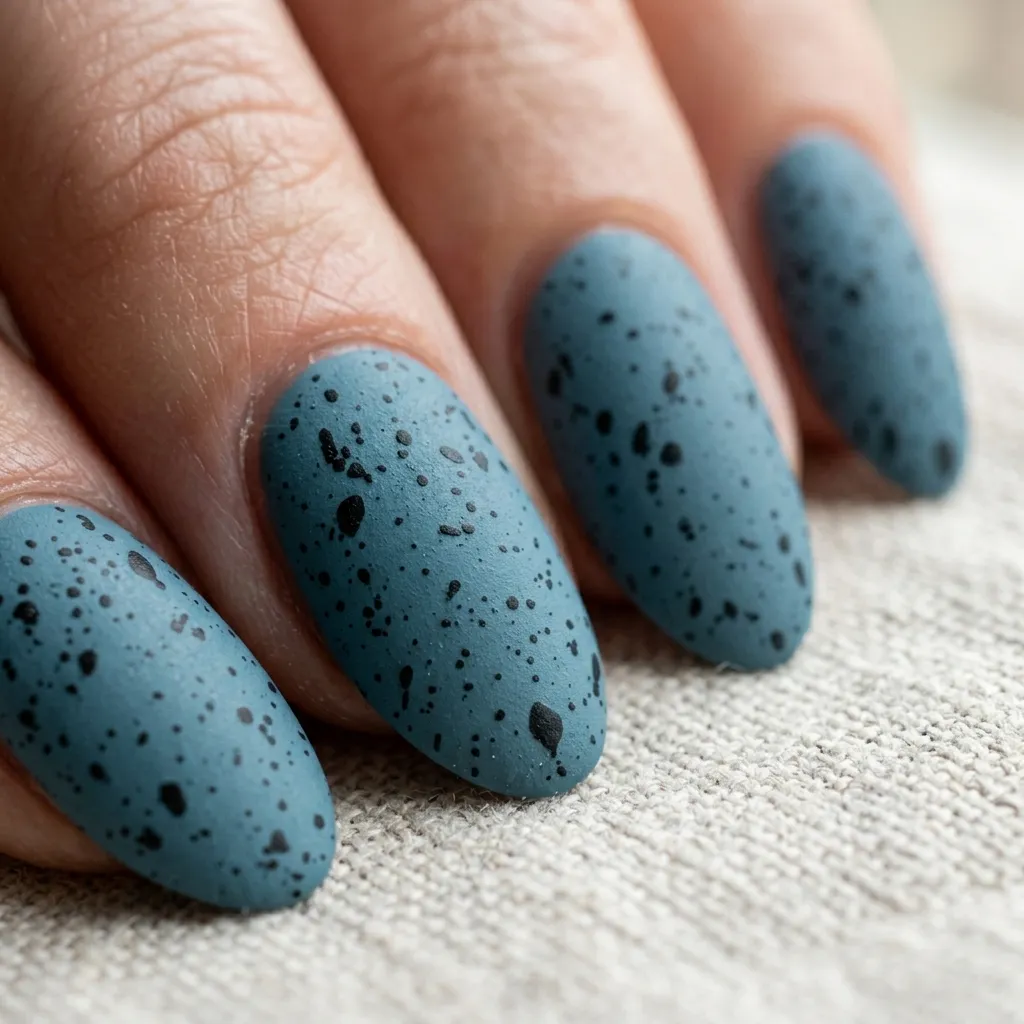
This look is a total classic for a reason. It’s textured, interesting, and reminds everyone of Easter morning without being “themed.”
A soft duck-egg blue with tiny black flecks looks high-end and artisanal. It’s basically the ceramic mug of nail art—cozy but elevated.
- Step 1: Apply two coats of a muted, dusty pastel blue.
- Step 2: Use a “speckle” top coat or flick a toothbrush dipped in black polish for the spots.
- Step 3: Finish with a matte top coat for that realistic eggshell texture.
Pro Tip: If you’re doing the toothbrush flick method, practice on a piece of paper first to get the “spray” pattern right.
8. Iridescent Seafoam Dream
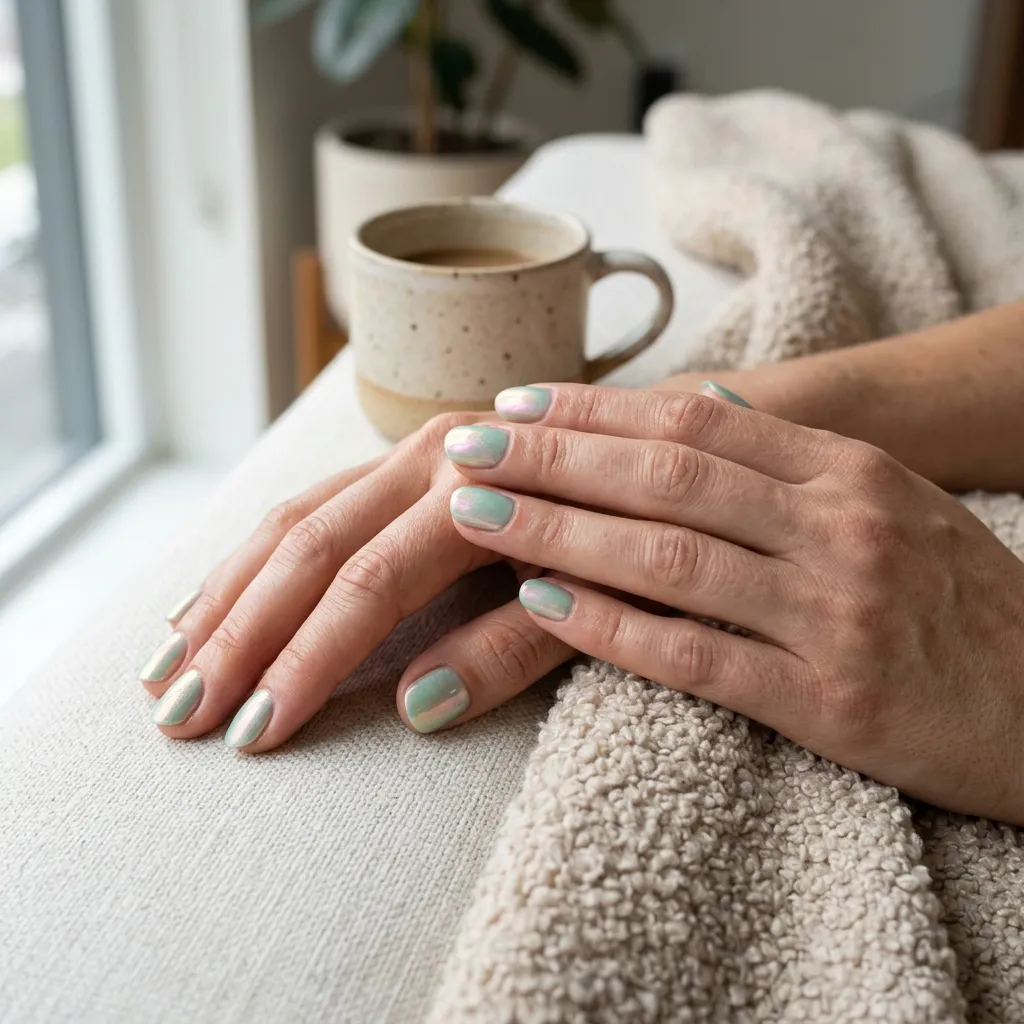
Seafoam green is often overlooked, but it’s actually the perfect bridge between winter and spring. Adding an iridescent or “aurora” top coat makes it look like the inside of a seashell.
It shifts in the light, turning from green to pink to gold. It’s magical without being over-the-top glittery.
- Step 1: Paint your nails a solid pastel seafoam green.
- Step 2: Layer one coat of an iridescent shimmer polish over the top.
- Step 3: Cap the free edge to prevent the shimmer from peeling.
Pro Tip: This look looks best under natural sunlight—perfect for those outdoor spring coffee dates!
9. Minimalist Baby Pink Dots
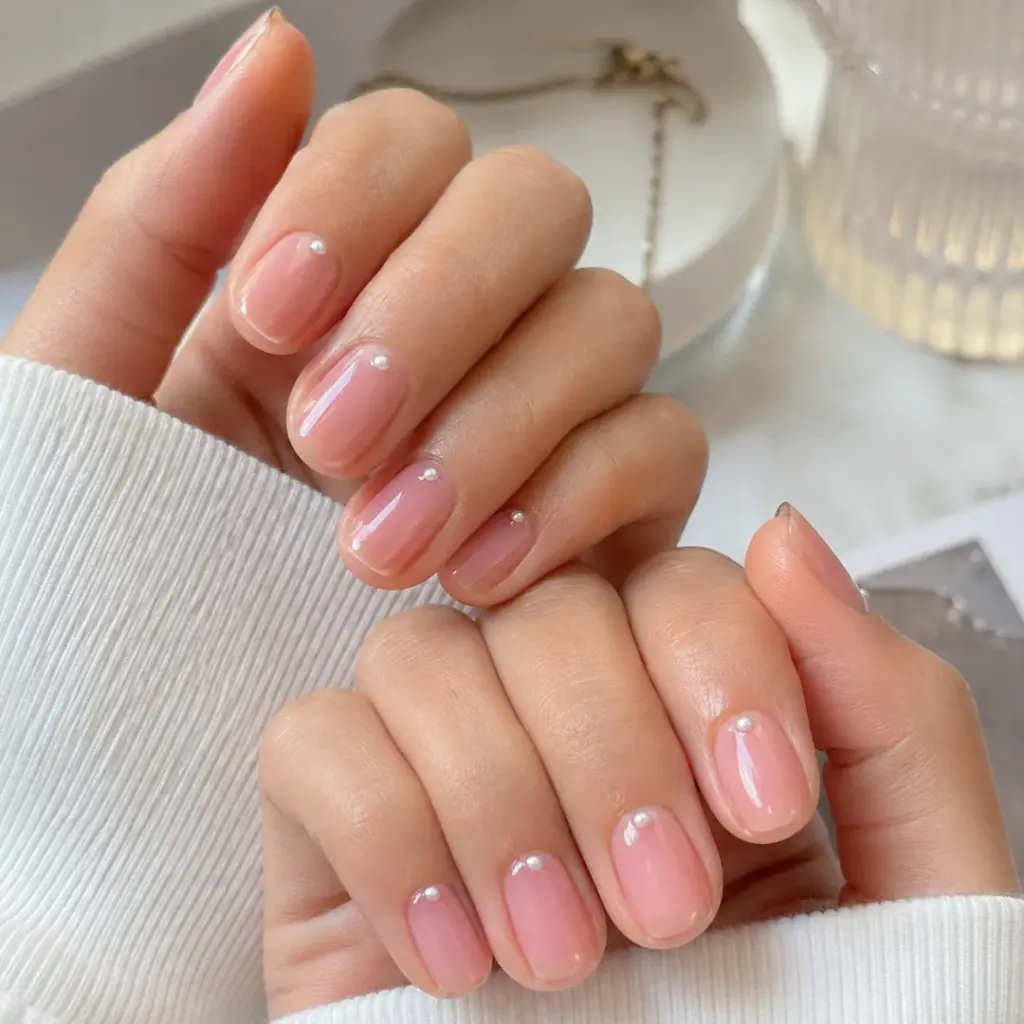
For the “I don’t do nail art” girlies. This is the ultimate “clean girl” spring look. It’s just a healthy-looking pink base with one single, tiny white or silver dot at the base of each nail.
It’s so simple it’s almost frustrating, but it looks incredibly expensive and polished.
- Step 1: Apply a sheer, “your nails but better” pink.
- Step 2: Use the end of a bobby pin or a dotting tool to place one tiny dot near the cuticle.
- Step 3: Seal with a super-shiny top coat.
Pro Tip: Placement is everything—make sure the dot is perfectly centered for that symmetrical, high-fashion look.
10. Cloudy Sky Blue
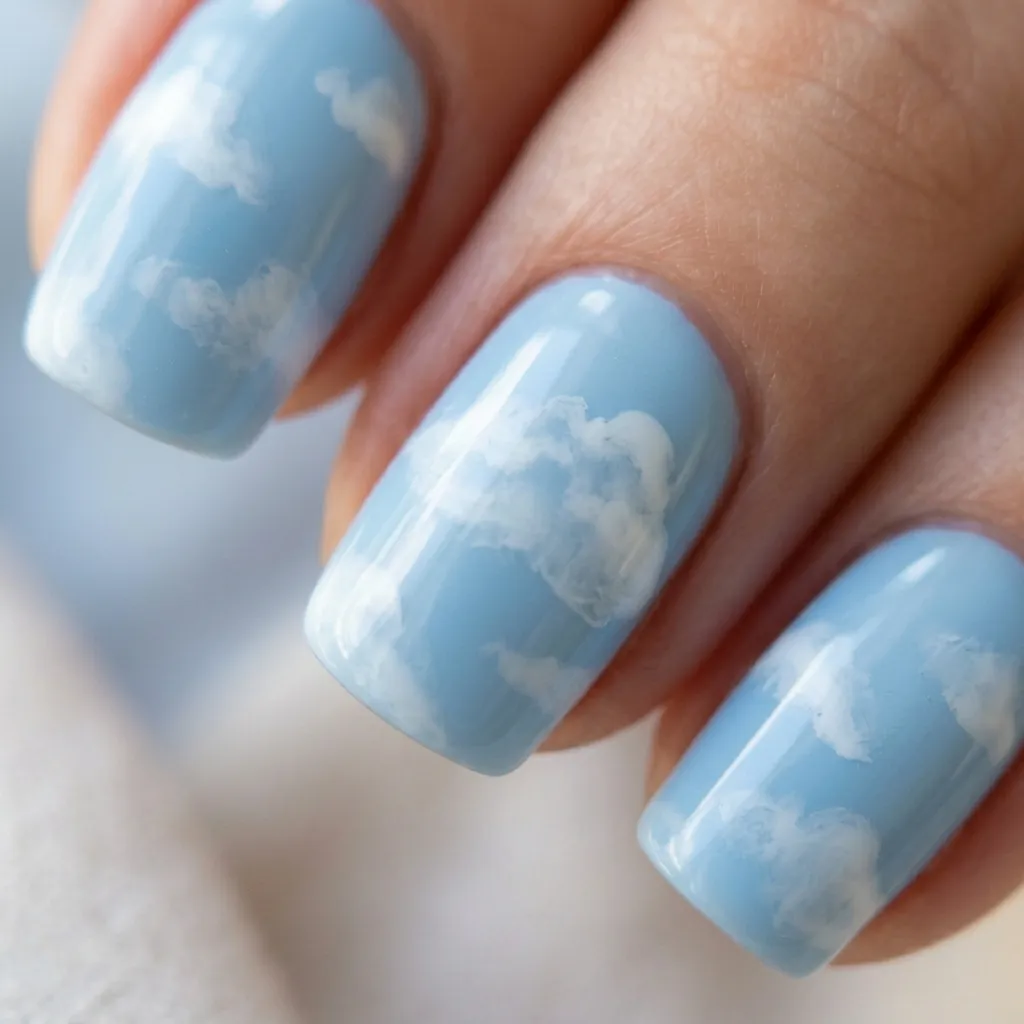
There’s something so calming about a soft, powder blue. It’s the color of a clear spring morning.
To keep it from looking flat, you can add a “cloud” effect using a bit of white polish and a sponge. It’s dreamy, whimsical, and surprisingly easy to pull off at home.
- Step 1: Paint a solid base of light powder blue.
- Step 2: Use a small piece of sponge to dab “puffy” white shapes randomly.
- Step 3: Soften the edges of the “clouds” with a bit more of the blue polish while wet.
Pro Tip: Don’t make the clouds perfect circles; organic, irregular shapes look much more realistic and “dreamy.”
Final Thoughts
Getting a “glow-up” doesn’t always mean a total lifestyle overhaul. Sometimes, it’s just about the little things—like catching a glimpse of a fresh, pastel manicure while you’re typing or grabbing your morning coffee. These soft pastel spring nail ideas are meant to be a fun, low-pressure way to lean into the season.
If you’re doing these at home, remember that the “prep” is just as important as the polish. Take five minutes to push back your cuticles and hydrate your hands with a bit of oil. It makes even a simple $5 polish look like a $100 salon job. Spring is all about renewal, so treat your hands to a little TLC and enjoy the bright, airy vibes!